This tutorial describes how to host the FireStart RemoteEventReceiver (FireStart-RER) in Azure.
These steps should be done directly after the installation of the FireStart Server and Client via the setup, but before the server is started. If your server is already running you cannot change the RemoteEventReceiver URL in the last step, therefore, you won't get any events when you host the FireStart-RER in Azure. If the FireStart server is already running, stop it, so that the configuration steps can be executed.
Preparations on Azure
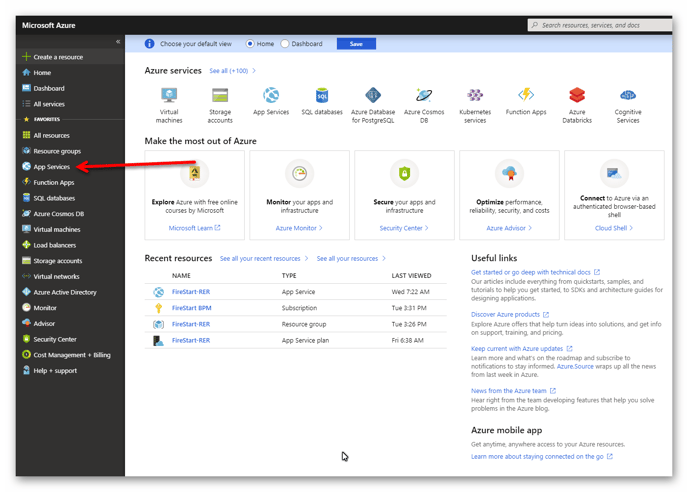
After logging in to portal.azure.com you will most likely be greeted with the Home screen.

From there you need to navigate to App Services.
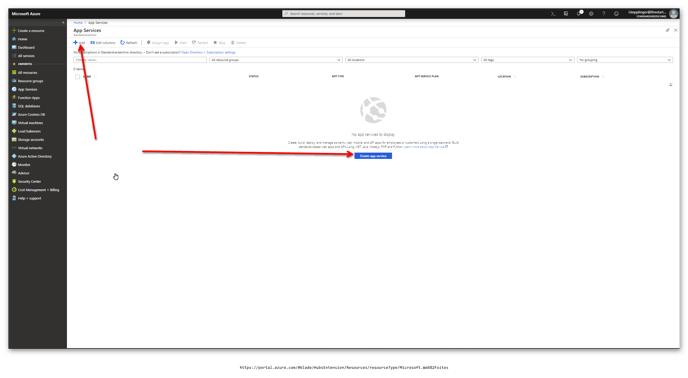
On the App Services page, there is either a list of running App Services (if you have any) or a page that says you don't have any services to display. Depending on what is displayed you either click Create app service or simply Add.
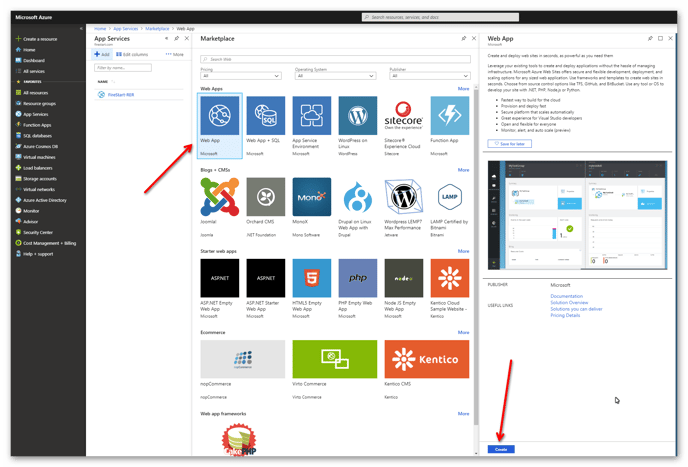
On the next page you first have to select Web App and then click Create.
After that, you will have to configure the Web App as follows:
- name the Web App
- select a Subscription
- decide whether you want to create a new Resource Group or use an existing group
- select Windows as OS
- select Code as Publish method
- select an App Service plan/Location
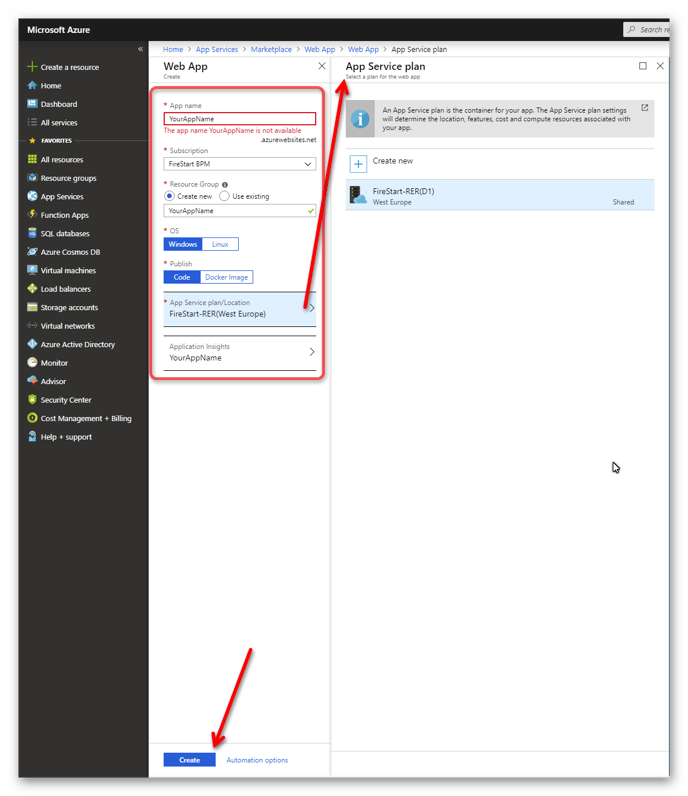
We recommend that you create a new Resource Group and App Service plan so that every created resource, app service etc. will be in that group and gives you a nice overview. With a new App Service plan, you will also be able to select the location/region of the hosting server. The name of the Resource Group and Application Insights automatically change to your App name.
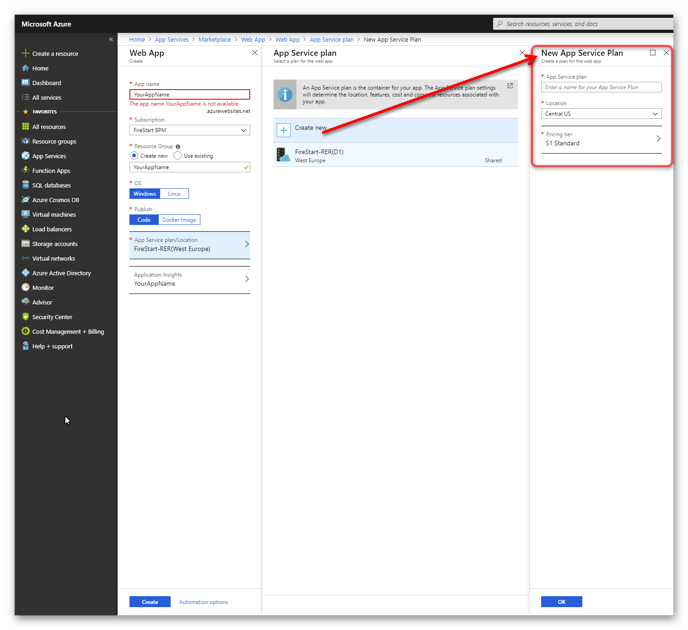
The App Service plan can be created directly in the App Service plan/Location configuration. Simply click Create new and enter a name, select a Location and your Pricing tier.
Click Create again and your app is created.
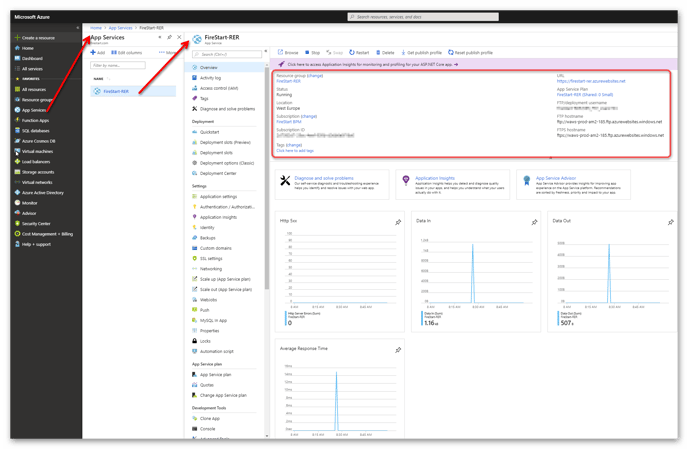
The next step is to select your previously created app. To do that, navigate to App Services and select your app. The URL where your app is hosted, the FTP hostname and the username for FTP can be found here:
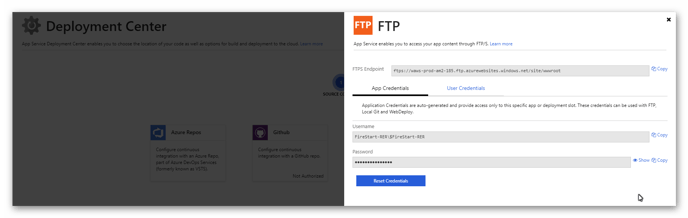
If you don't have an FTP hostname and/or username or you would like to change your username, click Deployment Center, select FTP and click on Dashboard.
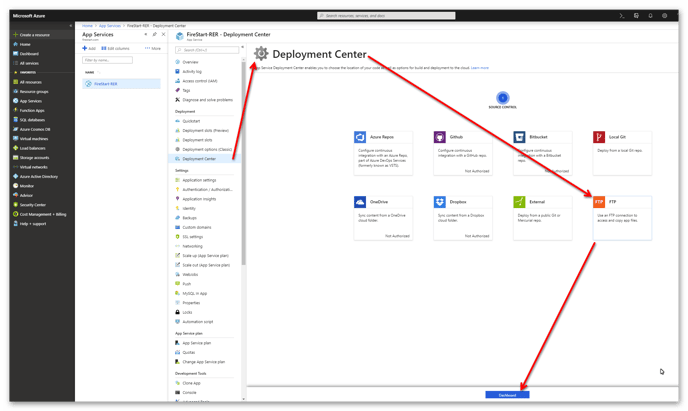
In the opened dialog you can now change your App Credentials and your User Credentials. Only the App Credentials are required to connect to your app via FTP.
Configuration in FireStart
The next step is to set your FireStart-RER URL in the Configuration Wizard. Start the Configuration Wizard and select the tab Remote Event Receiver. Simply copy & paste your <yourappserviceurl> into the field RemoteEventReceiverUrl and click Apply. Do the same in the tab FireStart - Optional for the field Remote event receiver url.
The properties ServerUrl, Port, Username, Password, and Domain are set automatically.


Deployment on Azure
After you've configured the App Service and set your RemoteEventReceiver URL, you have to copy the FireStart RemoteEventReceiver files (located at %installdir%\PROLOGICS Remote Event Receiver) to the provided FTP server. All files and folders should be copied into the site/wwwroot folder.
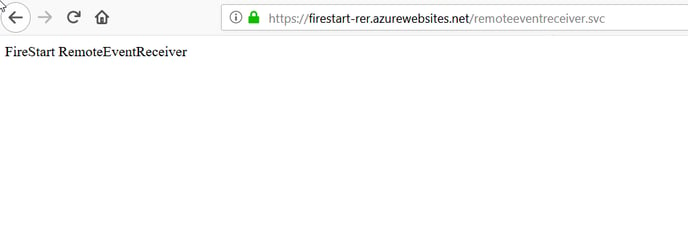
You can easily check if you did everything correctly if you try to browse to <yourappserviceurl>/RemoteEventReceiver.svc . The following site should be displayed: